Creating a Central File for worksharing/synchronising
1. Open the file you want to make the 'central file', click 'save as'
2. Choose the desired central location and file name, then under 'options' in the save window check the 'Make this a central file after save' option.

This is now the central file in the location you selected.
Creating a Local Copy
Everyone working on this project then wants to create their own local copies they can work on, and synchronise to the central file at regular intervals. (NB. all users must have access to the central file location for this to work).1. To make a local copy, open the central file by going via the Revit Projects, Open function.

3. There should be an option at the bottom of this window next to open which is automatically checked to 'Create new local'
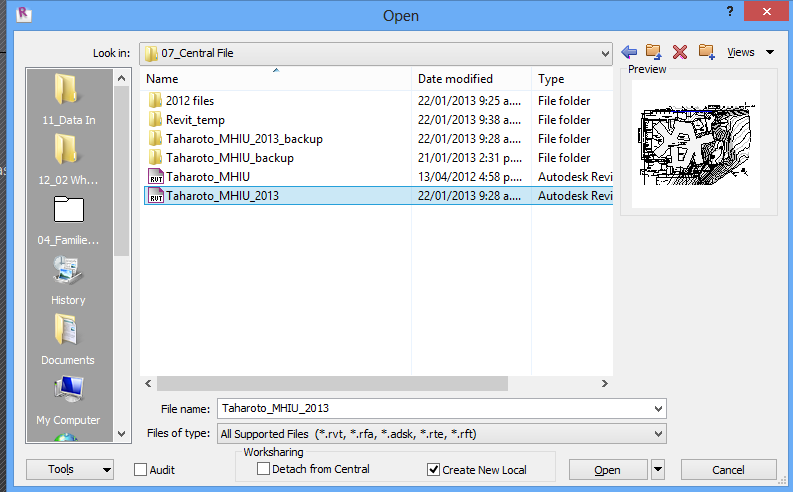
A new local copy has now been created on your computer (in your default directory for saves) and any automated or default save actions will now save this file there instead of back to the central file- but the system will also prompt you to synchronise at regular intervals with the Central file (you can choose to synchronise with the Central when needed as well).